Pull-Apart Garlic Bread with Cheese

For New Year’s Eve, my wife and I had a quiet night in.  I decided to go with a simple soup and salad menu for the evening, but I wanted to add a little extra flair with the bread.  I remembered always enjoying a fantastic cheesy, buttery, garlic bread at a great little place in Neptune, NJ called Mom’s Kitchen (since closed?) and I wanted to try to replicate as best I could.  The following recipe is what I came up with:

img_9277

Sorry for the crappy photo — I used my phone.

Pull-Apart Garlic Bread with Cheese

Ingredients:

1 loaf of Italian bread
1 16 oz. brick of whole milk mozzarella cheese
1 stick of butter
1 tsp. of garlic powder
handful of fresh Italian parsley

Directions

1. Pre-heat the oven to 350 degrees.
2. Carefully slice the bread into 3/4 inch pieces — BUT DON’T CUT ALL OF THE WAY THROUGH! (You want the bread to still be connected at the bottom.)
3. Melt a stick of butter. (I used the microwave.)
4. Add garlic powder to the melted butter and stir to dissolve.
5. Carefully drizzle the butter mixture between each slice. Any extra can be drizzled over the top of the bread.
6. Wedge 1 to 2 pieces of mozzarella between each slice of bread.
7. Wrap bread in aluminum foil and bake on a sheet pan for 20 minutes.
8, Unwrap the bread and let continue to bake for 5 – 10 more minutes until the cheese is nice and melty and the crust is nice and crispy.
9. Top with the chopped parsley.
10. Enjoy!


Cacio e Pepe (“Cheese and Pepper” Pasta)

Despite having very few ingredients, this Roman pasta dish has a lot of taste!  I highly recommend it if you are a fan of Italian grated cheeses and pepper…soooo much pepper!  Just be warned, it calls for a lot of cheese (specifically Pecorino Romano and Parmigiano-Reggiano), and if you get the good stuff (which you should), it’ll end up costing a decent amount of money for just these two ingredients!  But it’s really worth it!

cdp (1)

Cacio e Pepe (“Cheese and Pepper” Pasta)

Ingredients:

2 tablespoons whole black peppercorns
4 tablespoons extra-virgin olive oil
1 lb. spaghetti
3/4 cup grated Pecorino Romano
3/4 cup grated Parmigiano-Reggiano
About 3/4 cup of cooking water
2 tablespoons sea salt

Directions:

Crush the peppercorns using a mortar and pestle.  (If you do not have a mortar and pestle, you could use about 1 tablespoon of freshly ground cracked pepper.)

In a pot over low heat, heat the crushed peppercorn with the olive oil, stirring constantly.

Bring a large pot of water to a boil.

Turn the heat off under the olive oil and add about 1/2 cup of the cooking water to the pan, then set aside.

Add the salt to the boiling water, stir, then add the spaghetti. Cook the spaghetti al dente (or until 2 minutes under the lowest time recommended on the package). Using tongs or a pasta spoon (so you don’t get rid of the water), add the pasta to the pot with the pepper.

Turn the heat very low and gently toss the pasta continuously until most of the water is absorbed. At this point, remove from the heat and transfer to a bowl.

Continue to toss the pasta and begin adding the two types of cheese (about 1/4 cup at a time). If the mixture starts to get dry, add 2 to 3 tablespoons of pasta water. Keep tossing and adding cheese and pasta water until all the cheese has been incorporated and the pasta begins to look creamy.

Serve with extra grated cheese and extra pepper.

Name-That-Smoothie CONTEST

This morning I decided to create a brand new smoothie recipe and it’s absolutely delicious!  But the problem is, I can’t think of a name for it.  That’s where YOU come in!

Take a look at the recipe below and come up with a catchy, funny, descriptive, weird, or whatever name for my new creation and I’ll choose the one I like the most.  Your prize?  Not only will you have your name associated with this delicious smoothie for always and ever, you will also get to choose the next recipe The Guy Who Tries to Cook will actually try to cook.

So, help a struggling food-blogger out and submit a smoothie name in the comments section.

Note:  This contest is running simultaneously on the official The Guy Who Tries to Cook blog and on Facebook and Instagram.  Smoothie names will be accepted on each of these platforms.  One submission per person.  If you submit more than one name, only your first entry will be considered.  Deadlines for submission is July 7, 2016 at 11:59 pm.  Winner will be announced on July 8, 2016.

The yet-to-be-named smoothie next to a pile of used books my wife recently bought for her classroom.

The yet-to-be-named smoothie next to a pile of used books my wife recently bought for her classroom.

The (INSERT YOUR AWESOME SMOOTHIE NAME HERE) Smoothie

Ingredients:

3/4 banana (frozen, and chopped into pieces)
1/2 cup frozen raspberries
1 1/2 – 2 tbsp. almond butter (or just use one individual packet of Justin’s Almond Butter)
1 tsp. chia seeds
1 1/2 cups (or to fill line of a NutriBullet) unsweetened almond milk

Directions:

  1. Add all ingredients into your NutriBullet or high-speed blender.
  2. Blend for 30 seconds, or until smooth.

IMG_6550.JPG

Quick Review: Trader Joe’s Burrata, Prosciutto & Arugula Flatbread

A middling effort from Trader Joe’s.  The flatbread itself is the standout here.  Crunchy where it needs to be and softer everywhere else. Unfortunately, the burrata (which I love when it’s fresh) and the prosciutto both lack much taste.  Honestly, the prosciutto simply tastes like salt.  But, like most things at Trader Joe’s, the price-point is on-point.  At $4.99, I could see myself buying this again — despite the negatives — especially if I’m in the mood for something salty!

IMG_6536

The Rating:  Trader Joe’s  Burrata, Prosciutto & Arugula Flatbread gets a 3 out of 5.

Basil Pineapple Almond Milk Smoothie

So, I just bought a NutriBullet.  The company’s official app featured a recipe for a Basil Pineapple Smoothie.  I HAD to make it!  The taste was great, but the consistency was a little watery.  So, below, you’ll find my revamped version that should produce a more smoothie-like beverage.

A little too smooth?

A little too smooth?

Basil Pineapple Almond Milk Smoothie

Ingredients:

10-12 chunks of frozen pineapple
5 fresh basil leaves
1 cup unsweetened vanilla almond milk

Directions:

  1. Add all ingredients into your NutriBullet or high-speed blender.
  2. Blend for 30 seconds, or until smooth.

If you’d like to use the official NutriBullet recipe, download their official app.


The World’s Easiest, Crustiest, No-Knead Bread

There are plenty of no-knead bread recipes floating around the internet, but this one has to be the easiest — and the results are always top-notch!  It does require a Dutch oven capable of withstanding at least 450 degrees for extended periods of time, so before making this delicious bread make sure your ovenware can handle the heat!

Just look at that bread!

Just look at that bread!

The World’s Easiest, Crusty, No-Knead Bread

Ingredients:

3 cups all-purpose flour
1¾ tsp salt
½ tsp active dry yeast
1½ cups room temperature water

Directions:

1. In a large bowl mix flour, salt, and yeast. Add the water and use a spatula to gently mix it until everything is incorporated. Cover the bowl with plastic wrap and let it sit on your counter for 12 to 18 hours — or if you have cats, hide it on top of the refrigerator!

2. After enough time has elapsed, preheat oven to 450 degrees. Put an empty Dutch oven into your preheated oven and heat it until it reaches 450 F degrees — this should take about 20-30 minutes.

3. Using well-floured hands gently remove the dough from the bowl and place it onto a well-floured surface.  Gently shape the dough into a rough ball.

4. Carefully remove Dutch oven and remove the lid.

5. Take the ball of dough and drop it into the Dutch oven. Cover the pot with the lid and place it back in the oven.

6. Bake for 30 minutes with the lid on.

7. Remove the lid and bake for another 15 to 20 minutes until the bread is a nice golden brown.

8. Remove from the oven and let cool on a wire rack.

Product Review: Milk Bar’s cornflake-chocolate-chip-marshmallow cookie mix

The Background Story: A couple of moths ago, I came across an article on Refinery29 about gourmet and organic foods available at Target.  Since I go to Target several times each month and I like gourmet and organic foods, my interest was piqued.  I clicked through the slideshow (ugh, slideshows!) until I saw this:

Cookie Mix!

What?  New York’s famous Milk Bar has a cookie mix?  And it has cereal and marshmallows and chocolate chips?  And it’s available at Target?  For $4.99?  Oh, heck yes!

The next morning, I waited patiently as a nice Target employee unlocked the doors to the store at 8 AM.  I smiled, said good morning, and then did a bit of speed-walking to the baking aisle only to find a big empty shelf where these cookies were supposed to be.  Seriously?  Actually, I had to return to the store at least five times over the course of the next month until, finally, I found a single, solitary box.  But by then I decided to attempt (and complete) the Whole30 Challenge — and cookies were a no-no.  So the box sat on my shelf for a month.  Until yesterday, when baking finally commenced!

The Unboxing: The box for the Milk Bar’s cornflake-chocolate-chip-marshmallow cookie mix contains two plastic bags.  The first contains sugared corn flakes.  The second contains the actual cookie mix (with flour, sugar, chocolate chips, marshmallows).  The only other supplies necessary are one stick of butter and one egg.  Not bad!

The Baking: The instructions say to toast the cornflakes first at 300 degrees for about 10 minutes.  Which is fine, because it gives one time to combine the mix with the butter and egg.  And that’s the point where I kind of messed up a little.

The corn flakes are getting toasty!

The recipe calls for “softened (but not completely melted)” butter.  I had taken a stick out 30 minutes earlier, but it wasn’t close to being softened, so I popped it in the microwave.  It looked good, but as it sat there as I was getting out my bowls and spoons and checking on the corn flakes, it proceeded to get a little melty.  I didn’t think this would be that big of a deal, but…

…once everything was mixed together and the cornflakes were incorporated, I put the first batch of six cookies into the oven.  Almost immediately the edges of the cookies began to get a little runny and then, after only six minutes (of the suggested 10 – 12 minutes of cooking time), I noticed the edges beginning to brown at an alarming rate.  My darned melty butter!

Regardless, after ten minutes, they were done.

The finished product.

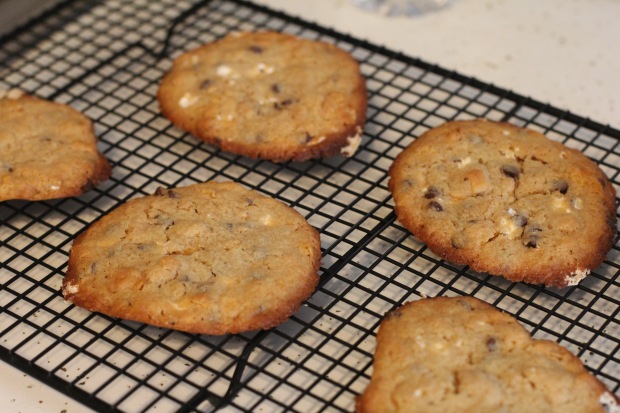
The finished product. They don’t look too bad, but the edges and bottoms were definitely a little burnt.

The Results: So how were they?  Well, the taste was excellent — despite being slightly burnt.  I was really surprised how much the marshmallow flavor really stood out.  It was a welcome addition to what would have otherwise been a fairly standard chocolate chip cookie.  I say this because the corn flakes didn’t really do much for me.  In fact, their texture left a lot to be desired! The cereal portion of the cookie was actually chewy instead of crispy!  And yes, I know — this may have been caused by my incorrectly softened butter, but next time I’ll toast them longer than the suggested ten minutes — just in case!

It should be noted that I have never had the original version of this cookie from Milk Bar in New York, but now I really want to go there.  I’d love to find out how these stack up to the original!

The Link: If you would like to try this mix, you can order it online from Target for $4.99.

The Rating:  Milk Bar’s cornflake-chocolate-chip-marshmallow cookie mix gets a rating of 4 out of 5.


Roasted Rosemary Lemon Chicken with Potatoes and Onions

One of the best meals that I made during my Whole30 Challenge, this roasted chicken dish is so easy to prepare!  The chicken came out incredibly tender and I loved the way the tartness of the lemons balanced so well with the savory rosemary.  Typing this, I want to make this dish again right now (and it’s only 9:00 am)!

rc

Roasted Rosemary Lemon Chicken with Potatoes and Onions

Ingredients:

4-6 pieces chicken thighs with skin (I used bone-in)
1 lb. baby red potatoes or fingerling potatoes
½ onion – cut in large chunks
2 lemons, 1 sliced and 1 juiced
⅓ cup olive oil
2 garlic cloves, minced
1 Tablespoon fresh rosemary plus sprigs for garnish
½ teaspoon crushed red pepper flakes
1½ teaspoon salt
½ teaspoon fresh ground pepper

Directions:

  1. Preheat oven to 400 degrees F.

2. Spray a glass 13-in. x 9-in. baking dish with cooking spray and set aside.

3. Chop onion and thinly slice one lemon.

4. Arrange chicken pieces (skin side up) in the baking dish, followed by the potatoes, sliced onion, and lemon slices.

5. In a small bowl, whisk together lemon juice, olive oil, garlic, rosemary, crushed red pepper flakes, salt and pepper. Pour mixture all over chicken and potatoes. Add more salt and pepper.

6. Bake uncovered for about 1 hour, or until chicken and potatoes are fully cooked.

Original recipe can be found at Laughing Spatula.